Monday, February 13, 2017

Rose Petal Blusher DIY


  Gorgeous DIY Blusher


I felt inspired yet again, this time by Japanese Beauty blushers. Which are not yet available state side. They are beautiful, and look as though the petals were created from powder. I wanted to capture that essence of over the top opulence, so I concocted a lovely do-it-yourself!


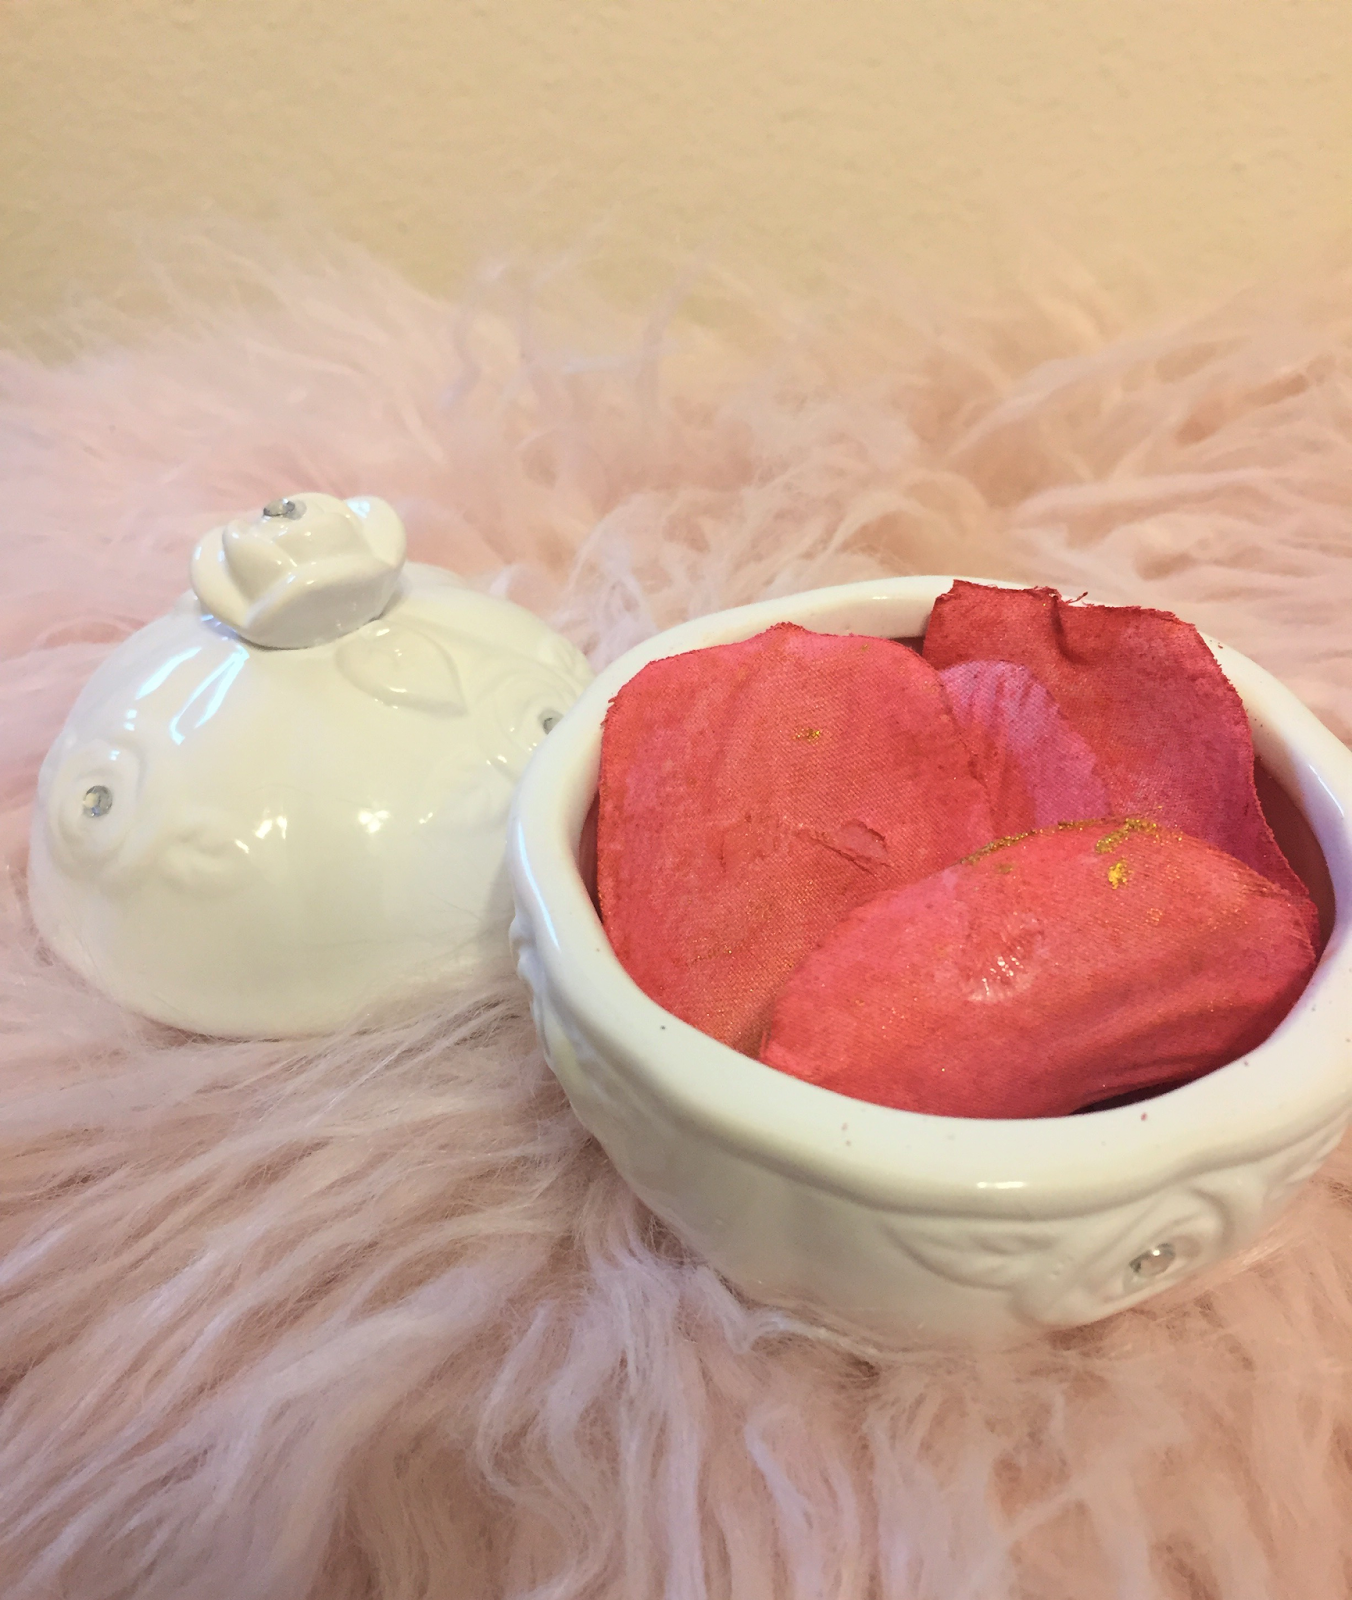
First gather your materials
You will need:
-craft rose petals
-Ziploc bag
-setting spray
-paper towels
-small jar/container ( I found mine at Daiso)
-powdered blush (or use a cracked one you own)
-shimmer pigment of choice (can omit for matte blush)


Step 1: On your paper towel-covered surface, open your Ziploc bag. Next pour 1- 2 tablespoons worth of powdered blush, for mine I used a Smashbox Halo blush which was about 2 full twists. Next add some metallic pigment of choice for some sparkle, or omit. Its your life not mine. 


Step 2: Now coat your rose petals with a generous spray from setting liquid of choice. You want the fabric to be moistened not soaking wet.


Step 3: Add your rose petals to Ziploc bag.


Step 4: Grasp the bag from the closure, so the powder doesn't fly, now shake the bag! Ensuring the petals are generously dusted. They look ready when they resemble spicy flavored chips like Lay's Flamin' hot.


Step 5: Remove from bag and let dry.


Step 6: Add the beautiful petals into your container of choice, now show off!
W/O Flash

W/ Flash


Hope you enjoy this fun cute take on blush! Its easy and will look gorgeous on any vanity counter.


Thursday, February 9, 2017

Rose Highlighter DIY


                 Have you been obsessing over gorgeous rose highlighter on Instagram?


I have too! After seeing it, I was disappointed in the color payoff but was still swooning over the packaging. Here is my rendition of the drool worthy gem, with minimal expense!

First you will need to gather your supplies. You will need:

-A fake rose, find one made of fabric. I found mine at a $1 store.
-1 container, found mine at Daiso for $1
-Paper towels or 1 medium sized towel
-Setting spray
-Makeup spatula
-Highlighters of choice
-Glitter pigment


First trim your rose, (if it comes from a stem) use sturdy scissors. Next begin cleansing your rose with warm soap water. To ensure there is no dirt or grime, because you do not want dirt particles on your face, like ever. After you have completed washing it, at this point you can let the rose air dry or start dazzling it. (I elected to let my rose air dry completely overnight)


Now that you have gathered the rose and its adorable container, do you have a fave highlighter that has cracked? Or have hit the pans of highlighters you can't let go of? Time to repurpose them! For my rose I used this Physician's Formula pan I swatched once, along with a Milani eyeshadow. Again, you DO NOT have to use what I did, use what you already have! 


Select your pigments or highlighter scraps you have at this stage.


LET'S BEGIN!

Step 1: Lay out your towel or paper towels on a nice even counter top. Arrange the following items nearby; highlighters, spatula, setting spray, and rose.

Step 2: Crush your powder to form an even fine powder with the spatula.


Step 3: Mix in setting spray with the powder mixture

I used Smashbox Primer Water.


Step 4: Get the mix into a wet liquid highlighter texture, not a paste. If it is too thick add more setting spray or it will be tough to work with.


Step 5: Begin coating the petals from the bottom petals up using fingers.


Step 6: Once you have covered the entire rose, its time for the glitter pigment! Use as much or as little as you would like. It adds more sparkle to the finished product. ( I used a iridescent clear)

Sparkles

Step 7: Place this rose in her container with the lid off to let it air dry over night.


Now you'll be the envy of all your makeup addict friends! Enjoy and have fun creating this project. It will look beautiful sitting on your dresser, or anywhere that needs a little magic! 


Why use oils in skincare?


It seems finding the right oil is a daunting task. However, it is worth the mission, plus your skin will thank you! It frightens me to know there are companies who use derivatives of antifreeze in skincare/ beauty products. HENCE the importance of ALWAYS reading the ingredient lists. I'm trying to lead a healthier lifestyle so it made no sense to continue slathering my face with just anything. I started to google, which is brilliant for finding holistic natural skincare. It also led me to learn more about man made synthetic materials that are deemed suitable for consumers. After leaving myself a tad bit horrified, I had to find better options for my skin. 

My personal favourite at the moment is GLOW GIRL! Beauty Serum. I love it because it's all natural and good for your skin oils. The oil serum absorbs nicely into skin. Which I think, first timers would be pleased with, as you don't feel greasy or heavy. There is no scent I detect in the product. I use this as a night routine product, 1 to 2 drops all over face and neck after toning. When my face is irritated from weather conditions or I'm having a reaction to other products, this oil saves my face! 

Ingredients included:
Unrefined coconut oil, unrefined extra virgin olive oil, rosehip oil, and jojoba oil. 

Key to why oils on oily skin work so well. They correct your skin and balance it out! I recommend starting slow as a night treatment only using it sparingly until your face becomes accustomed to the change. What may work for me may not work for you. If you're allergic to coconut oil this may not suit you. If you're not, try it out! It's amazing value for the price/ amount. It not only helps your skin but can hydrate stressed out hair as well. For more on the product mentioned visit their website: http://www.totalglowenterprises.com/


                         Here you can see how light weight it is on the back of my hand!